

Assigning access codes in Catalyst
Assigning codes for Everything DiSC on Catalyst is simple with the Catalyst Administrator Experience.
The instructions below use the admin functions in Catalyst (rather than EPIC). See how to activate Catalyst admin functions.
Instructions
Adding learners one by one
- Navigate to https://catalyst.everythingdisc.com/admin/organizations and select the Organization you would like to add a learner to.
.jpg)
- Click Add.
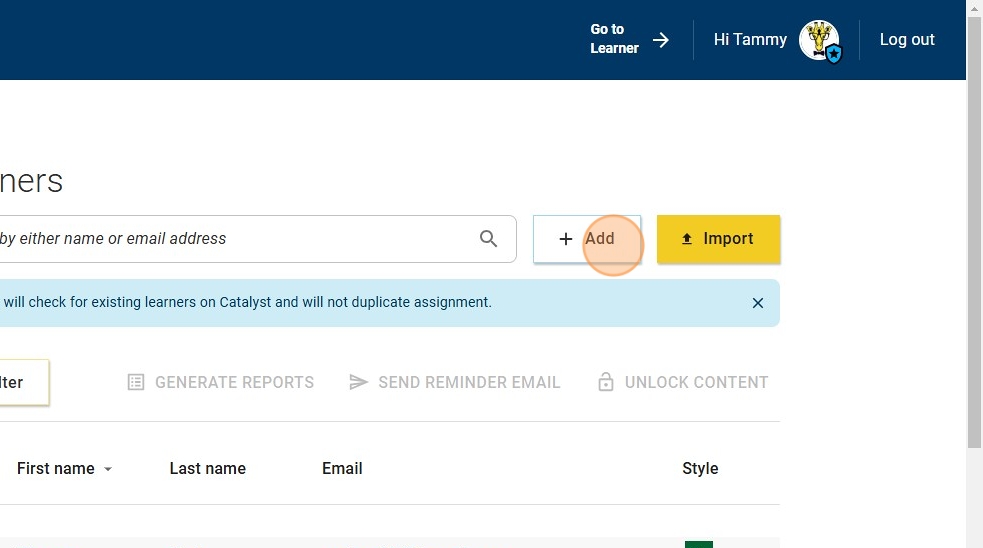
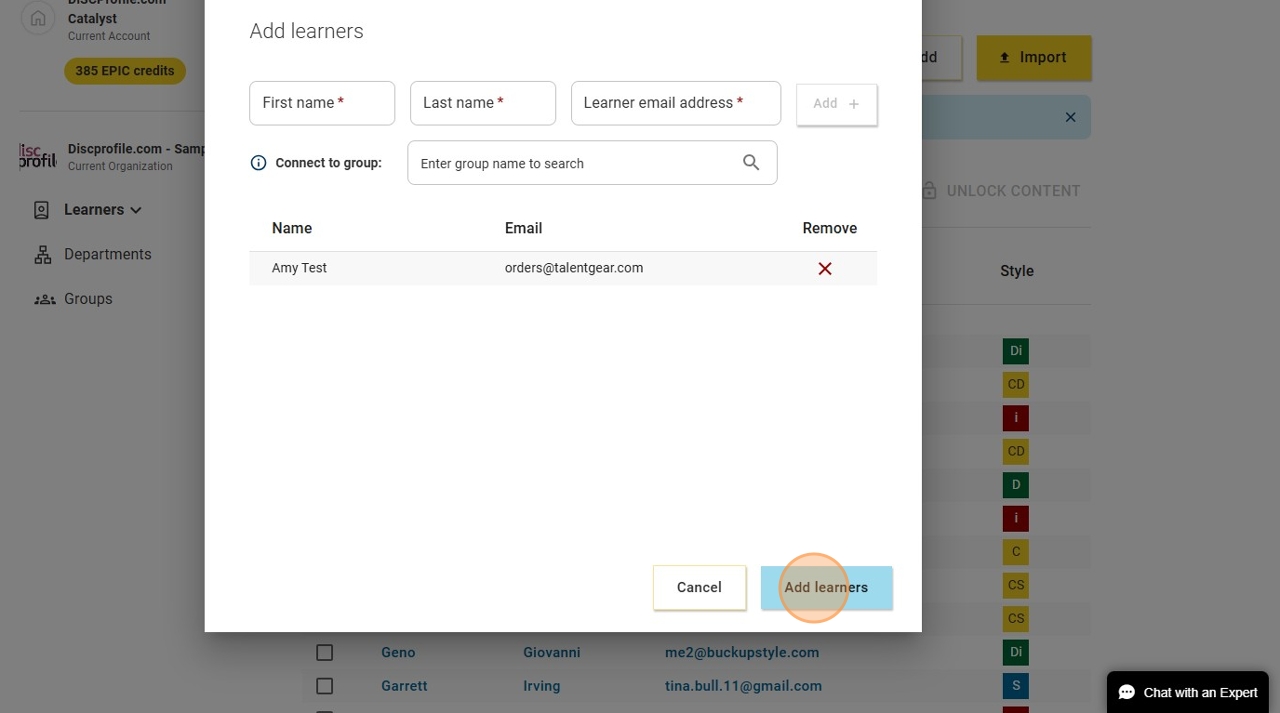
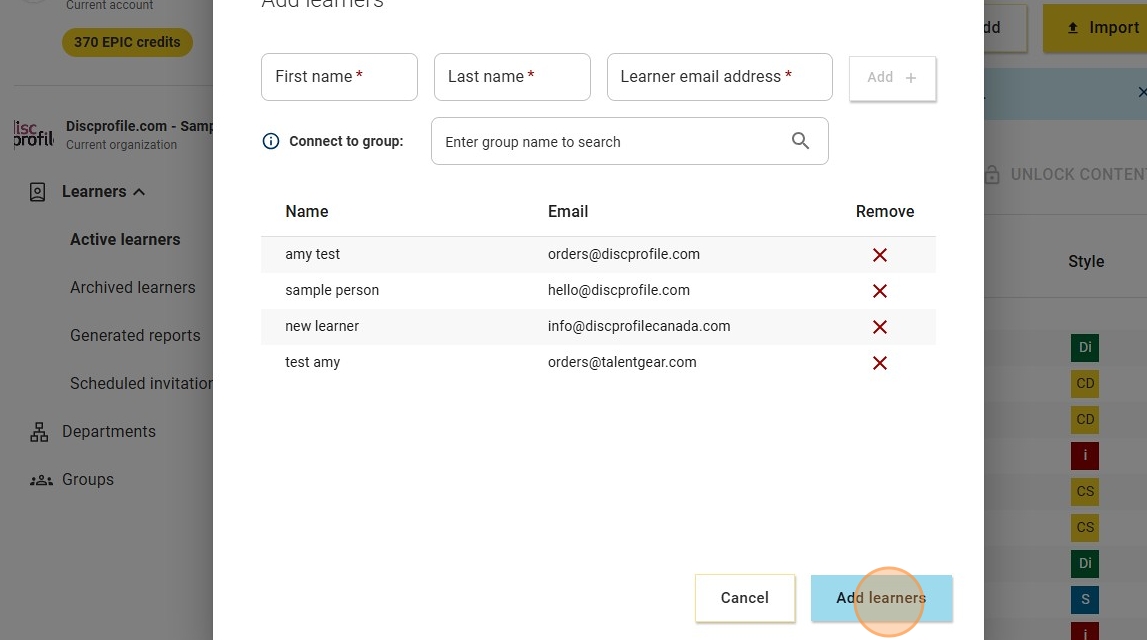
- Fill in name and click Add.

- Select whether you want your learners to get immediate access to their profiles with the Reveal style toggle. When Reveal style is selected, learners will discover their style on Catalyst right after they complete their assessment. When it is not selected, styles information will be hidden until you choose to reveal it to your learners.

- Repeat step 3 for each learner you want to add. Once you have all the learners you want to add on this list, click Add learners.
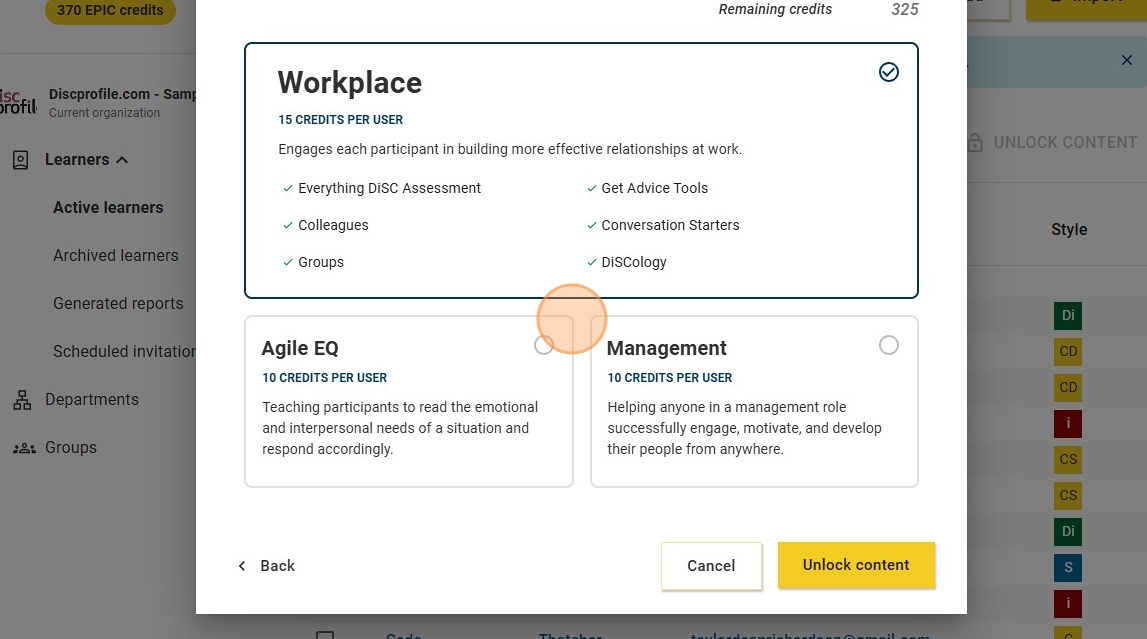
- Workplace is the default profile. You can add on Agile EQ, Management, or both for an additional credit cost.
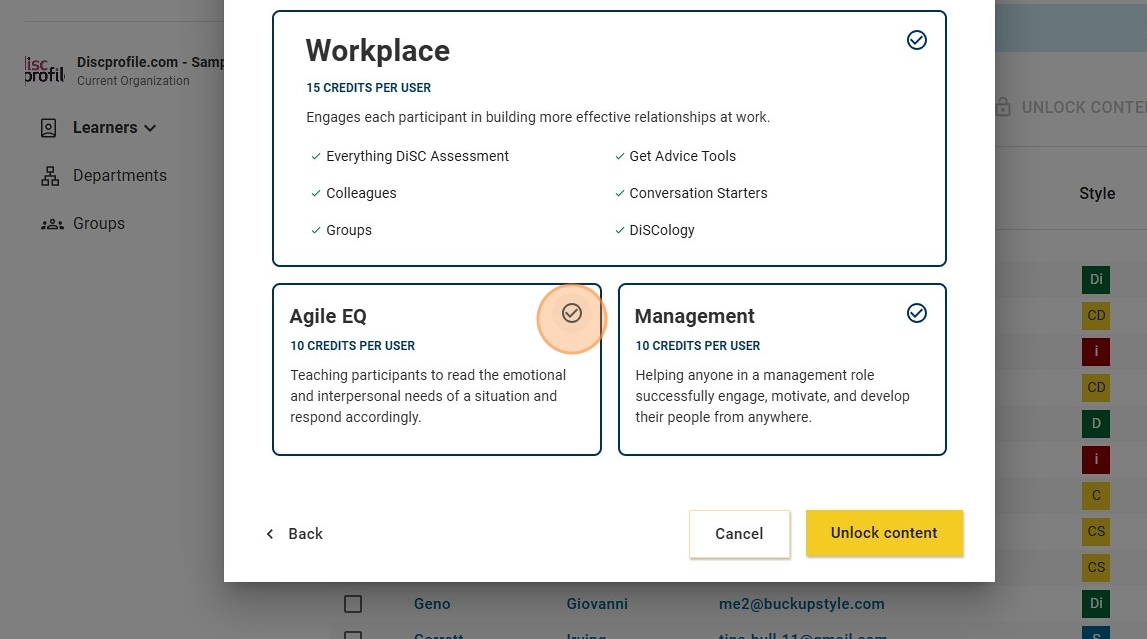
- Once you've finalized your module selections, click Unlock content.
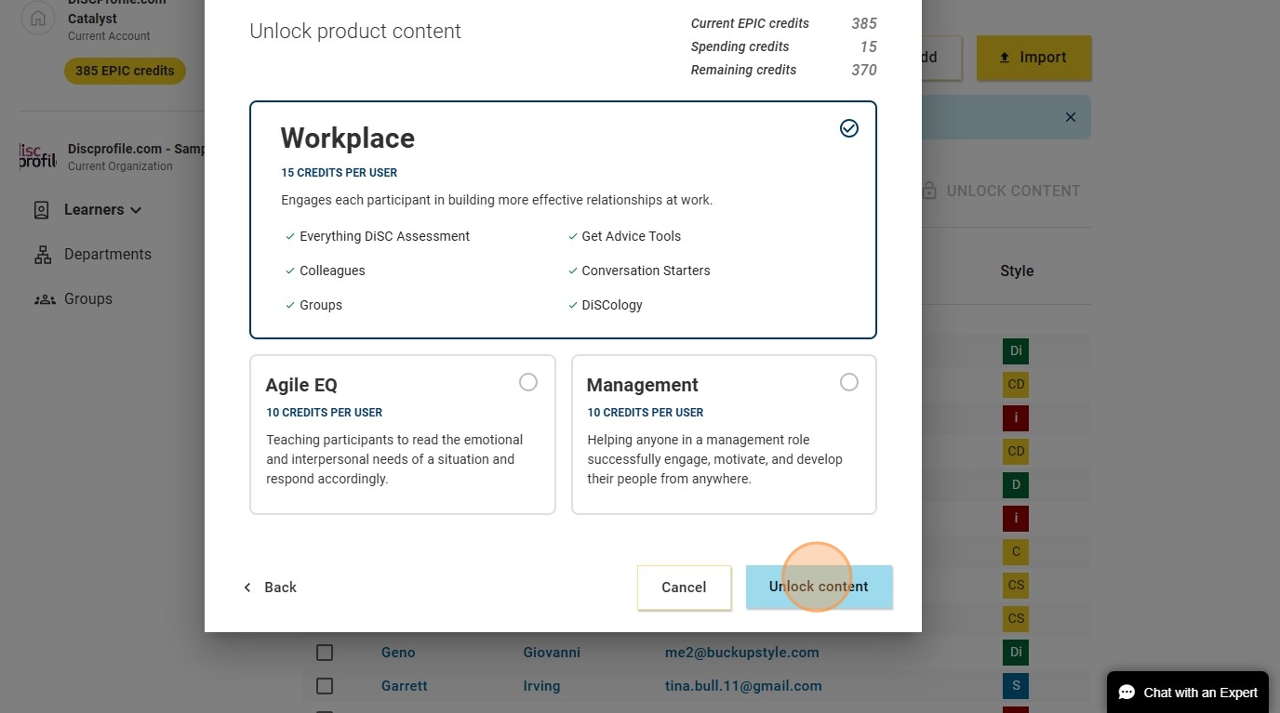
- Only check Agile EQ and Management if you are ready to give the learner access to those modules. They will get immediate access to the material.
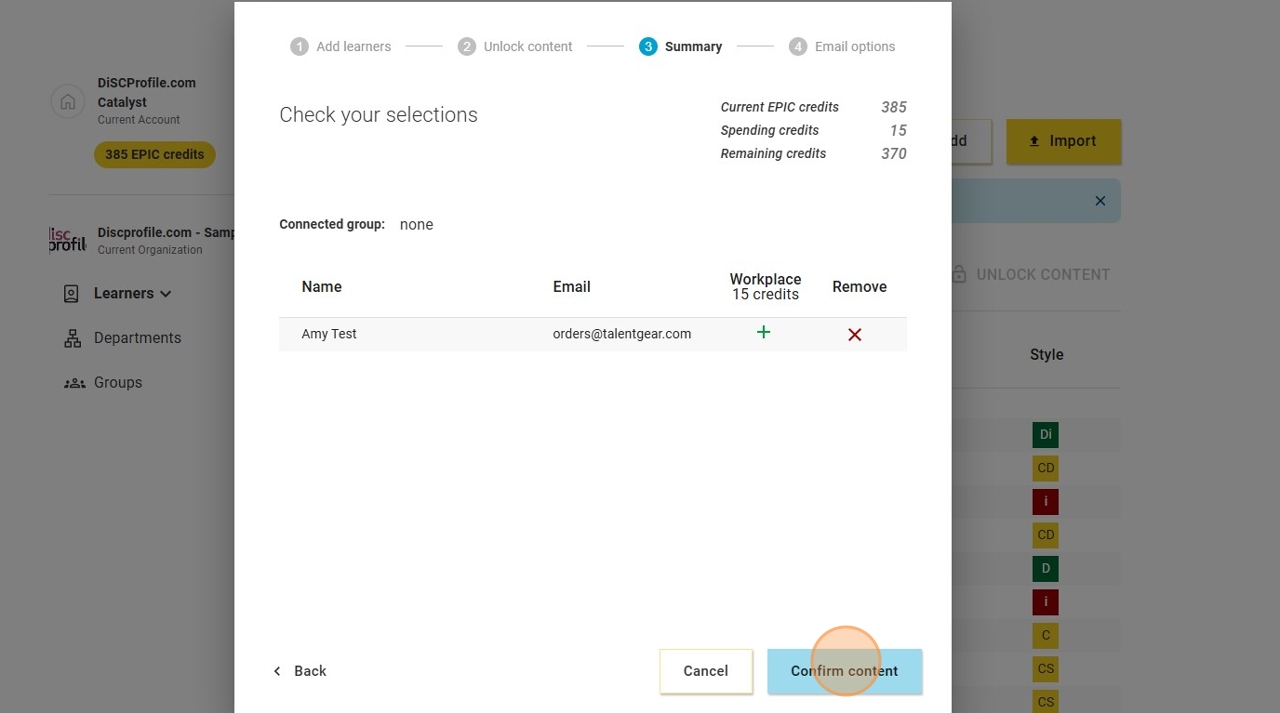
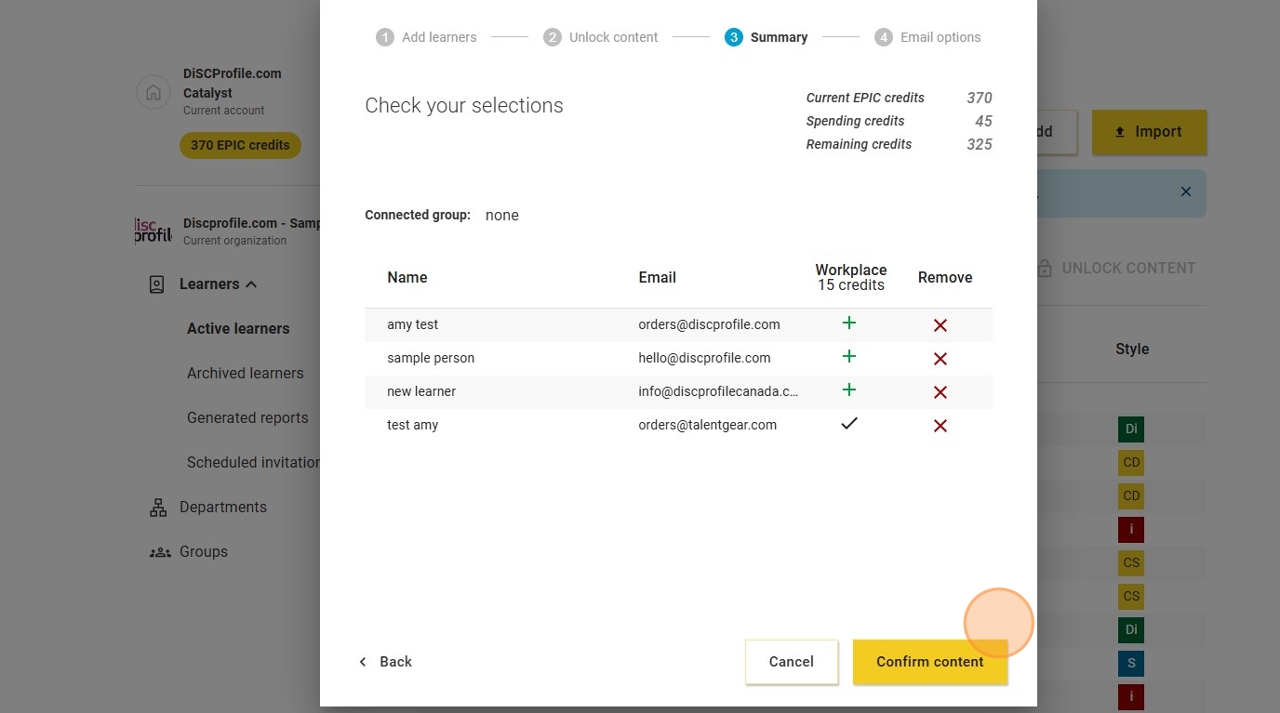
- Double-check to ensure all the learners you want to add are listed. Then click Confirm content.
- You can use the email options to specify when you want the email with the learner's access code to be delivered. You can also select if you would like a reminder sent to those who have not completed their assessments by a specific date. Type any additional information you want to include in this email in the Custom message box.
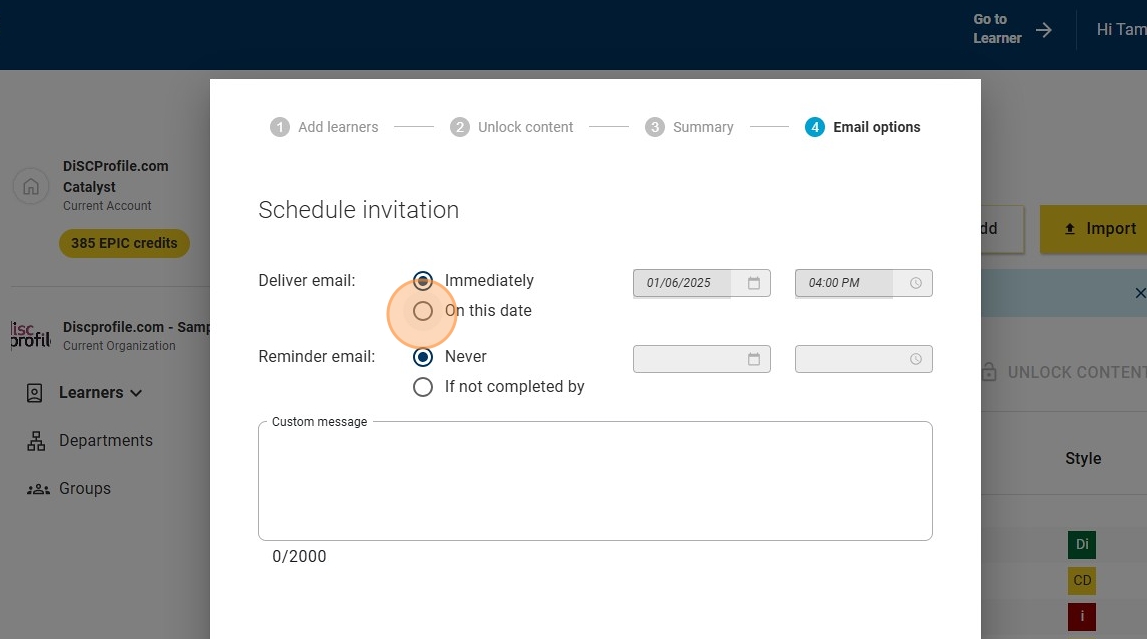
- We suggest including your assessment completion deadline, who to contact with questions, and what this will be used for; include a project name, group name, team building program, etc.
- Click Send Assessments.
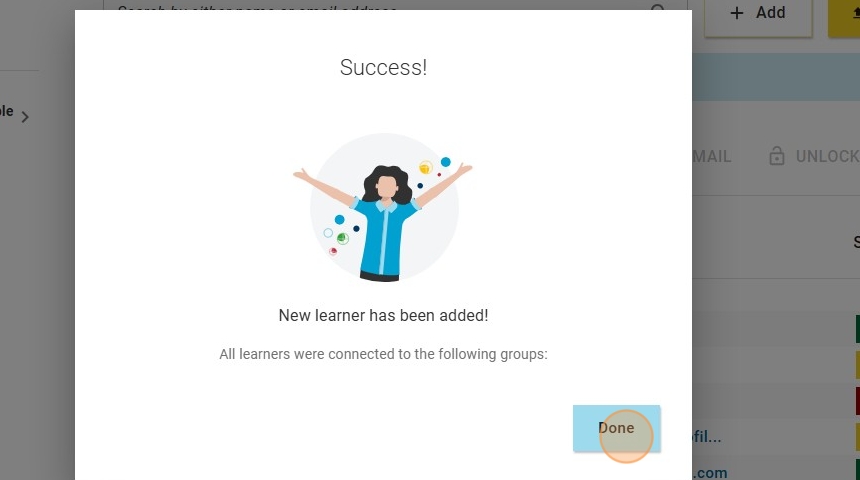
- Click "Done."
Importing a list of learners
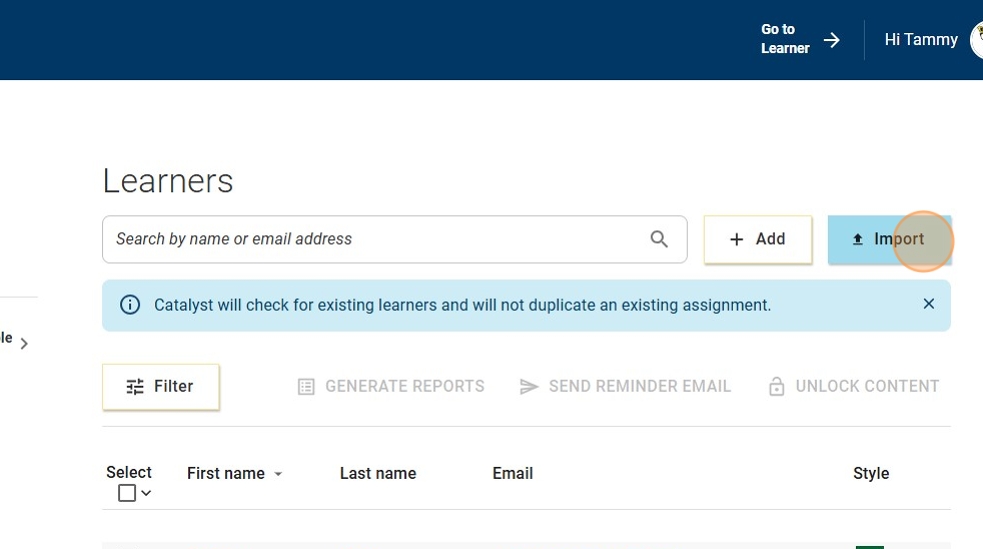
- Navigate to https://catalyst.everythingdisc.com/admin/organizations/936204/learners.
- Click Import.
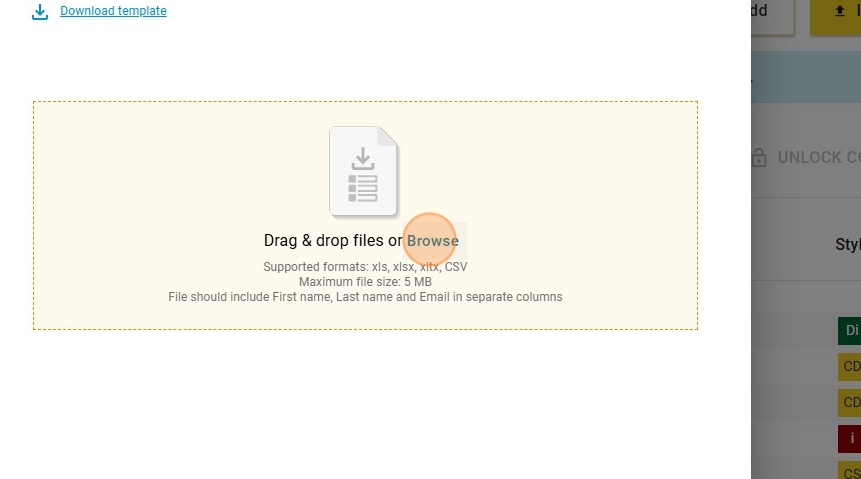
- Save the downloadable Excel template to your computer. You will need this template for this upload, and all of your future learner uploads!
- Fill out the Excel template with your learners' information and save it to your computer.
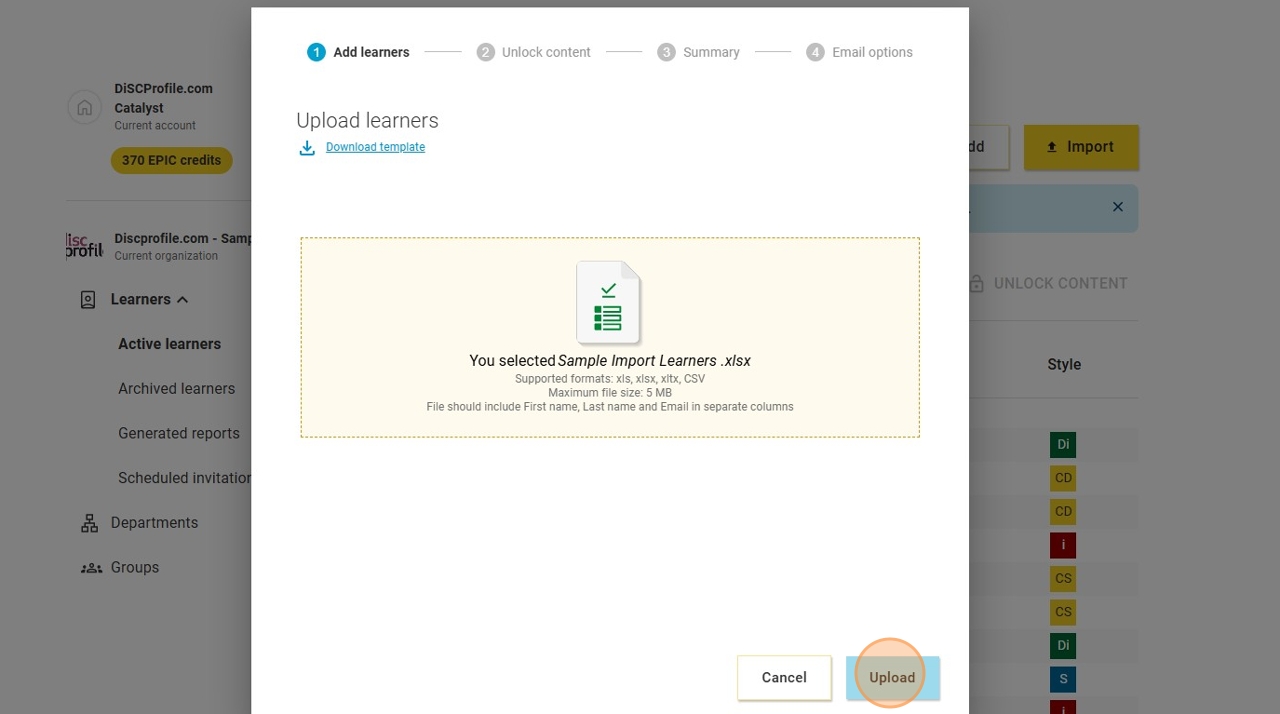
- Click Browse and upload your pre-completed Excel doc.
- Click Upload.
- Verify that your list is correct.
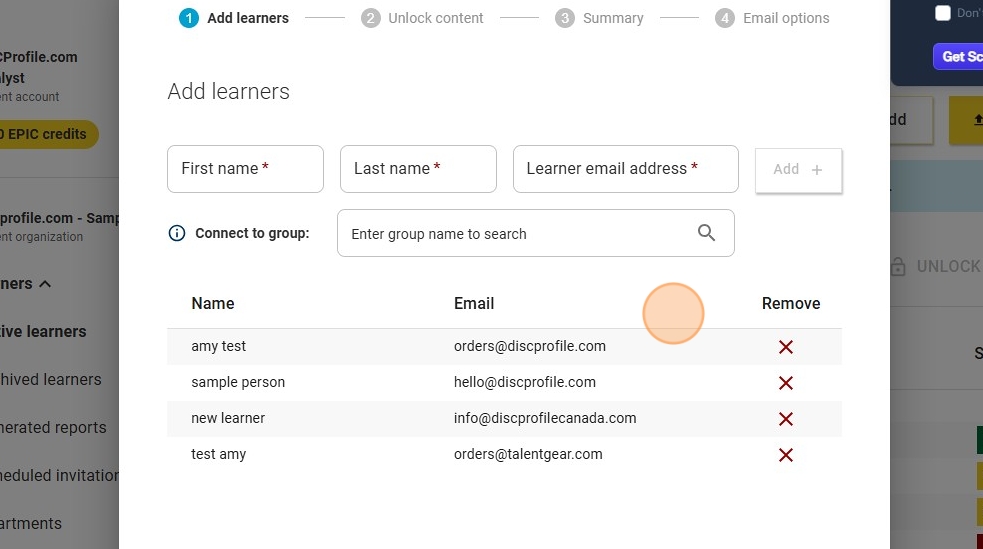
- If you need to add more learners that weren't in the Excel file, use the name and email address boxes to add them to the list.
- Click Add learners.
- Choose what profiles you would like each of your learners to get. Workplace is the default, and you can add on Agile EQ, Management, or both for an additional credit cost.
- Click Unlock conent.
- Review and click Confirm content.
- You will then select when you want the links to be sent and be able to create a custom messge. Once you are ready, click Send Assessments.